4.20.2 Set up Entra ID for federated services in the Azure portal
When accessing Microsoft Entra ID, the SwyxWare application must authenticate itself.
When you set up the federated services for secure access, you can

create a client secret in the Azure Portal and enter it in the Swyx Control Center,
or
generate a certificate in the Swyx Control Center and upload it to the Azure Portal.
Client Secret vs. Certificate
The expiration date of the secret client key in the Azure Portal is time-consuming to check. The maximum expiration date is limited.
You can set the expiration date of the certificate far in the future and it is directly visible in the Swyx Control Center. It is therefore recommended to use the certificate.
How to configure the SwyxWare application in Entra ID
1 Log in to the Azure portal as an administrator.
2 Select Microsoft Entra ID.
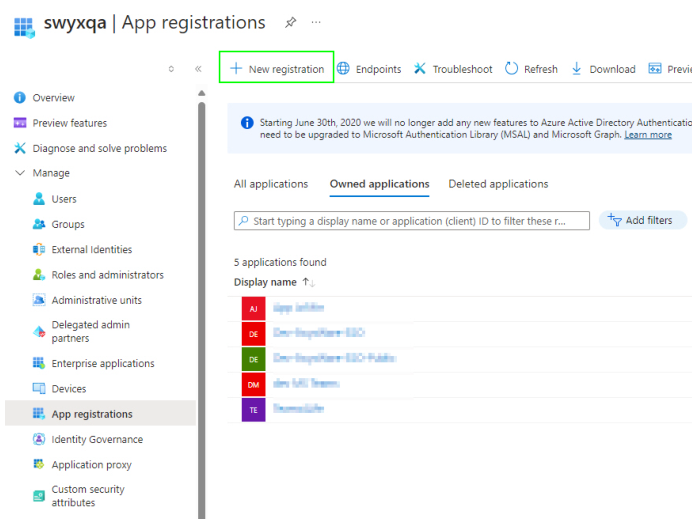
3 Select App registrations.
4 Click on New
registration.
5 Enter a name for the application.
6 Under Supported account
types, select the option Accounts in this organizational directory only
(<account> only - Single tenant).
7 Click on Register.
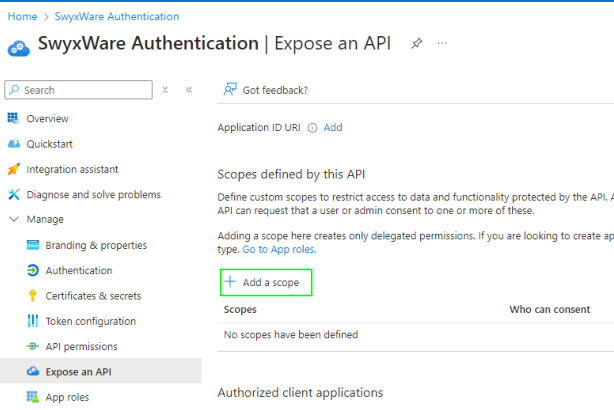
8 Select <SwyxWare App>
| Expose an API.
9 Click on Add a
scope.
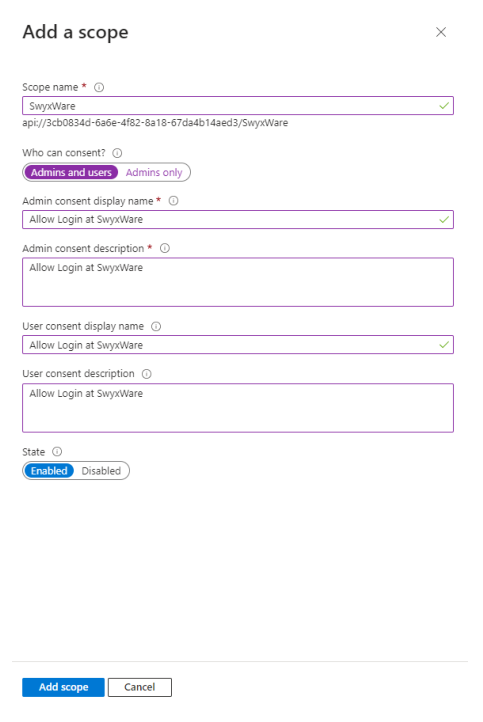
10 Enter the name "SwyxWare".
If an
Application ID URI has not yet been configured, add one. To do this, click on Add and
click on the suggested URI in the dialog that appears.
11 Select the Admins and
users option.
12 For example, you can enter "Allow login at
SwyxWare" as the display name and description.
13 Select Enabled and
click on Add scope.
14 Select <SwyxWare
App> | API permissions.
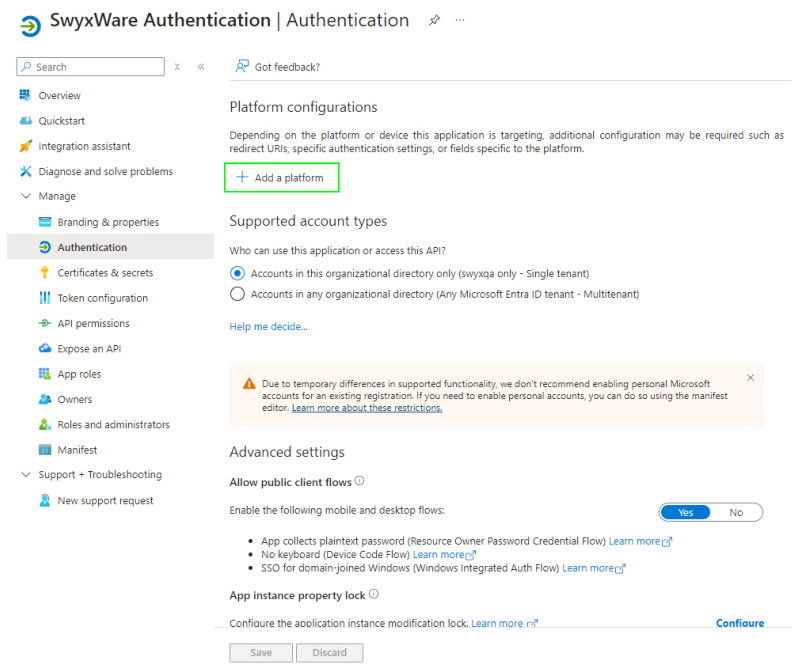
15 Click on Add a
permission.
16 Select <SwyxWare
App> | Authentication.
17 Under the menu item Allow
public client flows, select Yes.
18 Click on Add a
platform.
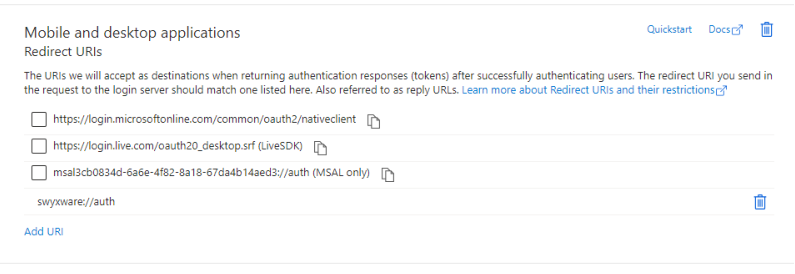
19 Under Mobile and destktop
applications, click on Add URI.
20 Enter the following URI: swyxware://auth
21 Click on Save.
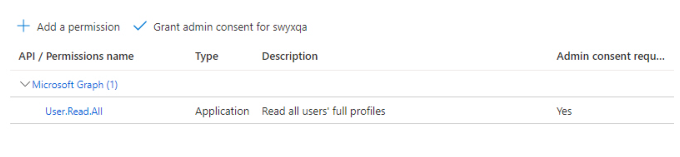
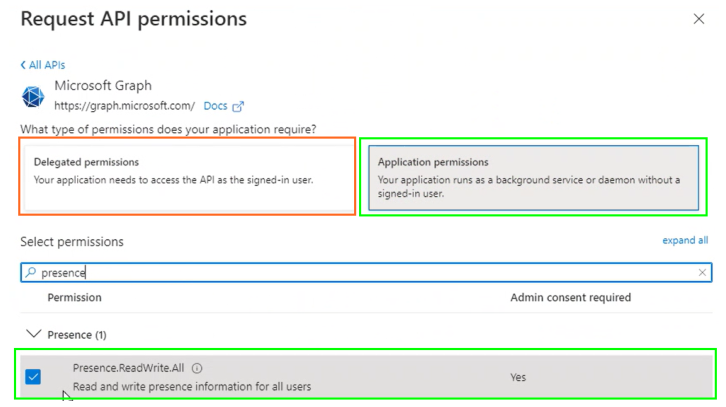
You must add the following authorizations:

User.Read.All (for general
functionality)
Contacts.Read (for contact
synchronization)
People.Read.All (for contact
synchronization)
Calenders.Read (for calendar
synchronization)
Presence.Read.All (for teams
presence synchronization)
If the SwyxWare status "Speaking" is to be forwarded to MS Teams (the
option
Both directions, see
5 Select
the Functions
tab):
Presence.ReadWrite.All

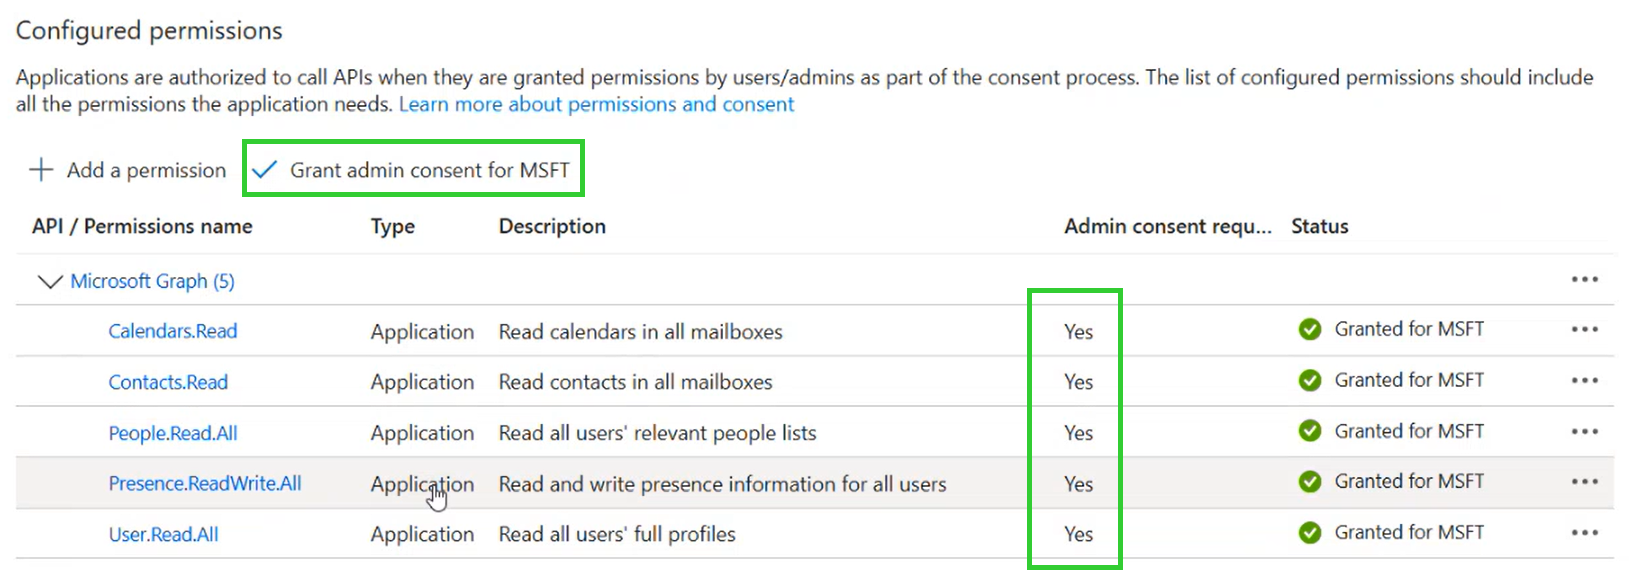
Each required API permission is
assigned to your domain:
24 Click on Save.
If a secret client key is to be used for authentication:
25 If necessary, create a secret client key under
Certificate and secrets | Client secrets, see "How to generate additional secret client
keys" under:
https://learn.microsoft.com/en-us/azure/marketplace/create-or-update-client-ids-and-secrets#update-the-client-secret-associated-with-your-client-id
For the validity of the client secret, we recommend selecting the
maximum duration.
26 Select <SwyxWare
App> | Certificates & Secrets.
27 Click on New client
secret.
28 Enter a description.
29 Select an expiration period.
30 Click on Save.
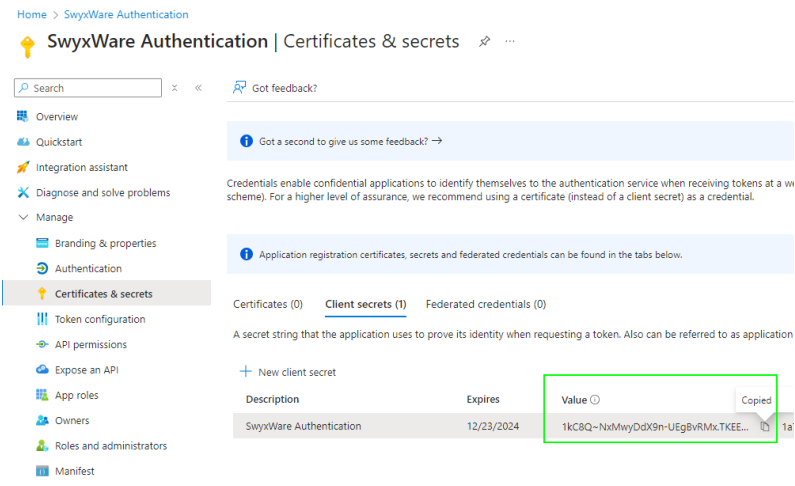
The new secret client key
appears in the list:
|
|
The value of the secret client key is subsequently hidden by "***...".
Save the value of the key (Value column) in a protected file immediately after
creating it and then enter it in Swyx Control Center (in the Client Secret
field).
|