Proxy Set Configuration
1. Click on the left in the tree structure on "VoIP | Control Network | Proxy Sets Table".
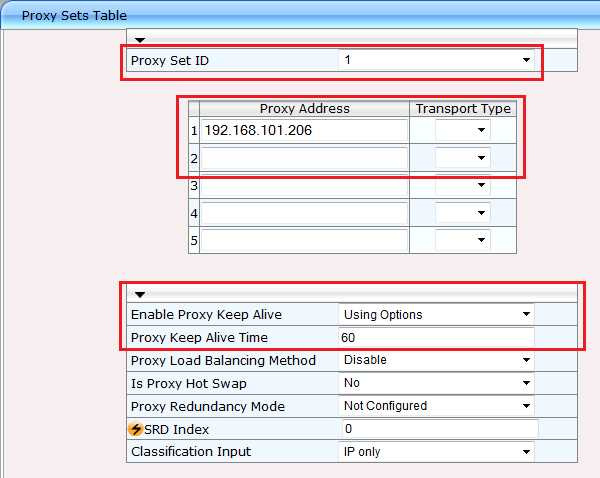
2. Under "Proxy Set ID" select the entry "1".
3. Under "Proxy Address" in lines "1" and "2", enter the IP addresses of your SwyxWare master and standby servers. If you are not using a standby server, leave the second field blank.
4. For "Enable Proxy Keep Alive" select "Using Options". This causes SwyxConnect 6000 to monitor the SwyxServer with SIP OPTIONS, and determines the active server.
5. Under "Proxy Keep Alive Time", specify how frequently SIP OPTIONS should be sent.
6. Click on "Submit" at lower right.
SwyxConnect 6000 monitors the availability of SwyxWare by sending SIP OPTIONS to the SwyxServer. If it answers, it is active. The more often SIP OPTIONS are sent, the more traffic arises in the network, with possible negative effects on VPN sections.
If using SAS, you then execute the following steps:
7. Under "Proxy Set ID" select the entry "2".
8. Under "Proxy Address", enter the IP address of SwyxConnect 6000.
9. For "Enable Proxy Keep Alive", choose "Disable", as the SAS proxy does not have to monitor itself.
10. Click on "Submit" at lower right.