1.7.3.3 Management
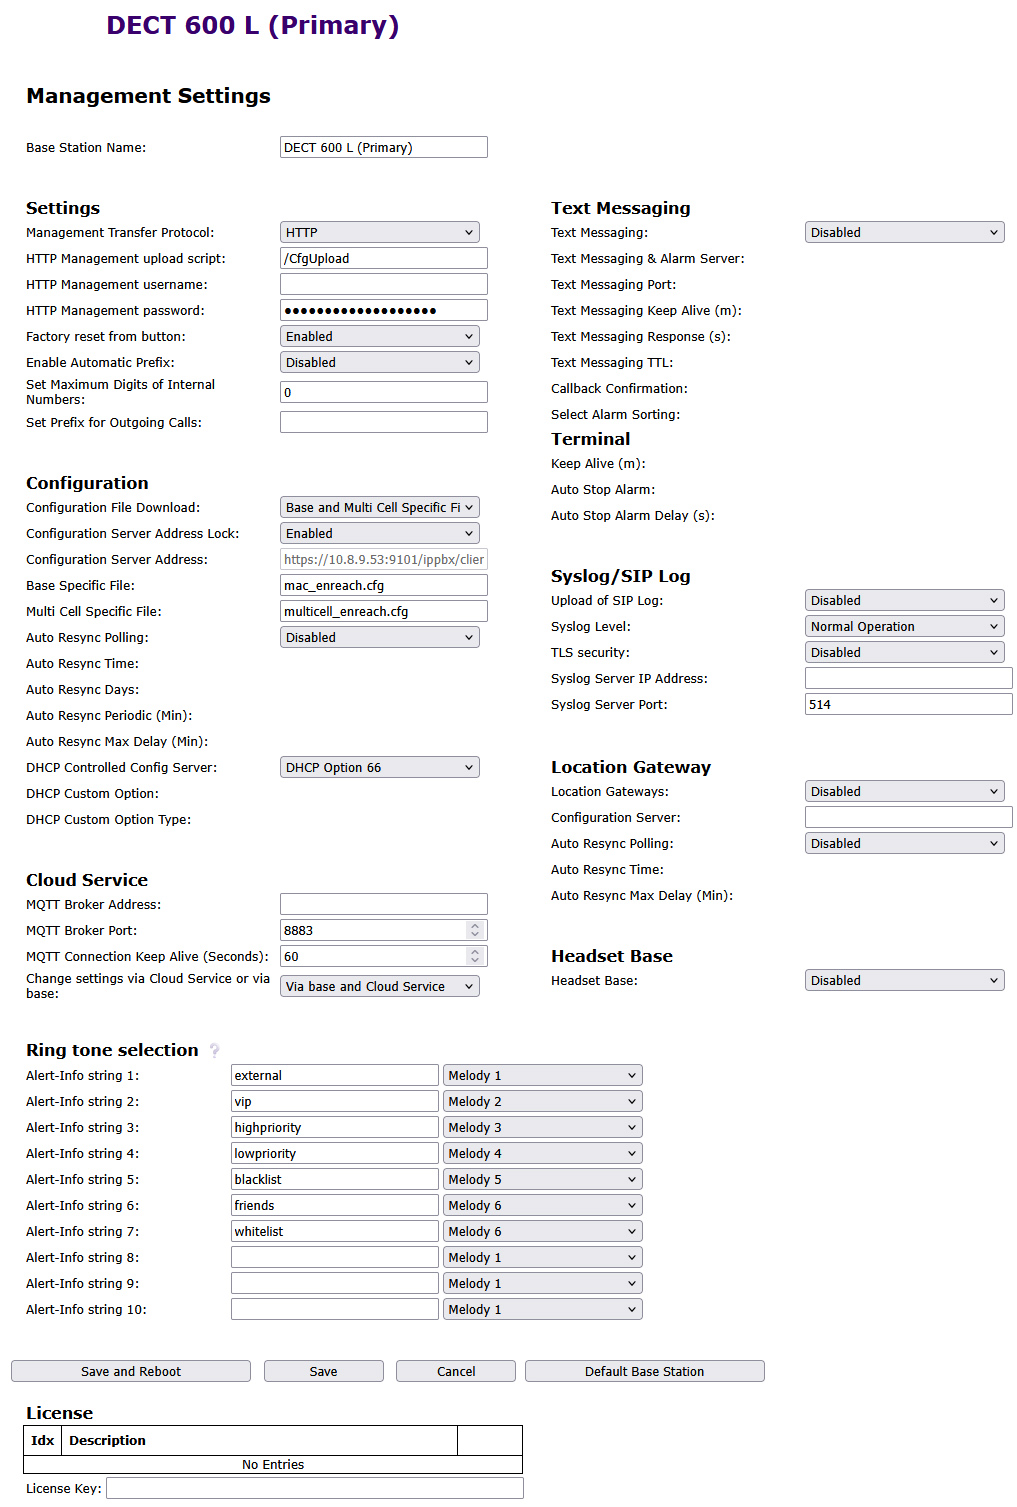
Settings
Function | Description |
|---|---|
Base Station Name | Enter a name for the base station. |
Management Transfer Protocol | The protocol to be used for upload/download of the configuration file or firmware file. |
HTTP Management upload script | The folder or directory path of the configuration server where the configuration file is located. |
HTTP Management username | User name to access the configuration server |
HTTP Management password | Password, to access the configuration server. |
Configuration Server Address | IP address of the configuration server. |
Configuration
Function | Description |
|---|---|
Configuration Server Address | IP address of the configuration server. |
Syslog/SIP Log
Function | Description |
|---|---|
SIP Log Server IP Address | IP address of the server where the SIP log file should be stored. |
Upload of SIP Log | Select Activate if SIP debug messages should be saved to the configuration server. |
Syslog Server IP Address | IP address of the server on which the log file of the DECT IP system is to be stored. |
Syslog Server Port | Enter the shared server port. |
Syslog level | Selection of the different levels of logging. |
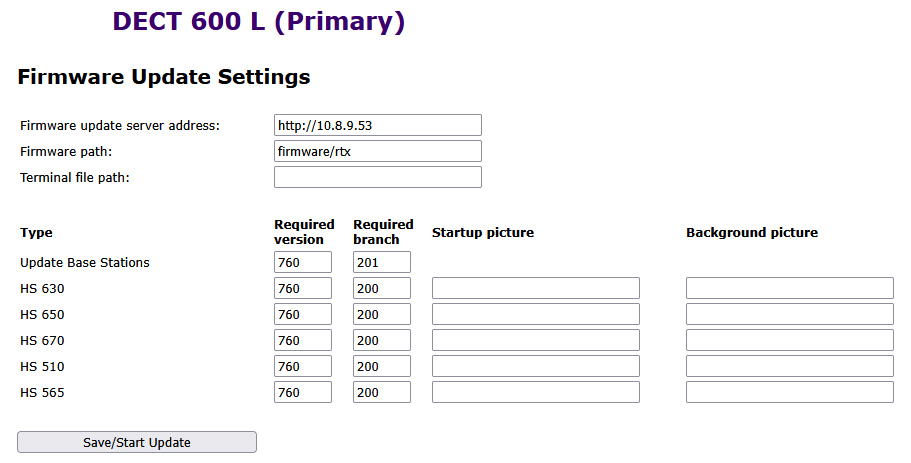
Firmware Update
In this section you can configure updates of base stations.
Function | Description |
|---|---|
Firmware update server address | IP address of the server on which the firmware update files were stored (http:// or TFTP). |
Firmware path | Location of the firmware update files. |
Required version Required branch | Displays the main and branch firmware version that is to be loaded onto the Type terminal device (handset/base/repeater). Omit leading 0 or zeros here. Example: Filename: DECT4024_v0530_b0002 530 = Required version (main version) 2 = Required branch (branch version) |
To update the software from a base station and/or handsets
You can find a TFTP server for free download here:
The 'update over the air' takes some time. All handsets must be in the charging station during the update!
Note that all bases in a system must have the same firmware version.
Country
Here you set the location of the system, the language of the web interface and the time settings to configure the region-specific default values.
By default, the time zone and daylight saving time settings of your country are used.
The Time Server is used to synchronize a multi-cell system. It also specifies the time, which is shown in logs and on SIP trace information pages as well as in the handset display.
Function | Description |
|---|---|
Time Server | IP address of the NTP server. |
Refresh time (h) | Period in hours for updating the time server. |
Timezone | Local time in GMT format. |
To apply the settings, click on Save and Reboot.
If you cannot reach a time server in the network, you can take over the time from your PC once by clicking on Time PC. However, when the base station is restarted, this time information is deleted.
Configuration
In the area Configuration you will find the view of the performed configuration in text form. The settings can be saved at this point in a file (*.cfg), for later use. In addition, an already created configuration file can be loaded here.
The passwords are not saved when the configuration file is saved. They must be set again!
To save the configuration settings in a file (*.cfg)
To load a configuration file
Syslog
In the area Syslog the system log files are provided for viewing.
SIP Log
In the area SIP Log the SIP log files are provided for viewing.