2.6.4.5 Get DTMF Char
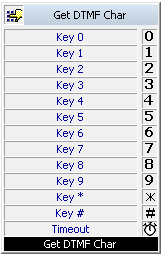
The block "DTMF key pressed" provides you the option of handling calls differently based on an entry made by the caller.
You can play an announcement, which prompts the caller to enter one DTMF character. This announcement can be repeated several times. Swyx will accept the entry during the announcement and -if so defined- after the last announcement.
Alternatively, it is also possible to import a character from a variable (e.g. a character string). The last (right) character will be imported. Then the variable will be deleted.
The action is terminated,
 as soon as a DTMF character has been detected, orafter the last timeout has expired, orif the connection is terminated.
Under "Properties", all three tabs "General", "Parameters" and "Connections" tabs are available for this block.
This is how you define the parameters for "DTMF key pressed"
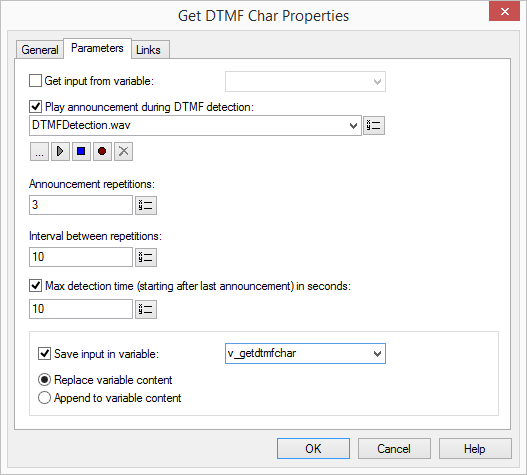
 From the dropdown list select a file.Browse your hard drive by clicking on
  .
.When searching, you can also choose a file in MP3 format. Upon selection, the MP3 file will automatically be converted into the WAV format and saved in the database on the SwyxServer. The converted files are therefore available for use later. During the conversion process, the Info dialog "Please wait, the file is being converted into WAV format" will open.
Click on , to listen to the selected file. Click on
  to stop playing the file.To record a new announcement, click on
  : You will now be prompted to enter a file name. The "Start Recording" window will appear. Click on "Start" to begin recording the announcement. Stop recording by clicking on .To delete the selected file, click on
  .
.The WAV files, which the administrator has made available to all users, have the extension "(Template)" in the file name. These templates cannot be deleted.
replacing the old contents of the variable orappending it to the old contents of the variable. (These are strings!)Please note that if during a Timeout an empty string will be transmitted.
Links
The output "Timeout" must always be connected in order to save an error-free script. Otherwise, the error message "No connection to ‘Timeout’" will appear in the Info pane. The outputs with the individual DTMF characters must not necessarily be connected. If a connected output is not visible on the interface, the warning "DTMF output ‘…’ connected but not visible" will appear in the Info pane.
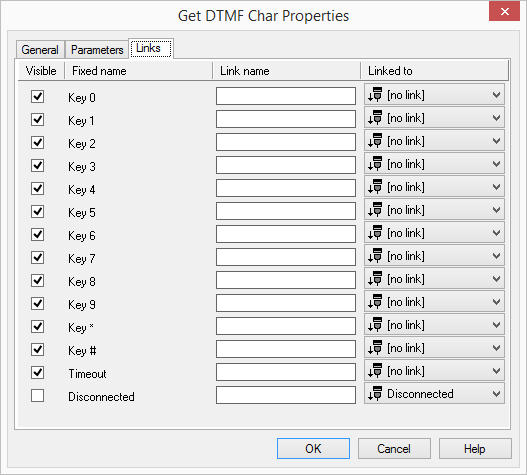
The outputs are described as follows:
Output | Explanation |
|---|---|
0-9, #, * | This exit is chosen if the appropriate character (0-9,#,*) has been detected. |
Timeout | This exit is chosen if no DTMF sound was received during the timeout. |
Disconnected | This exit is selected if the connection is disconnected. |
In the first column "Visible", you can define whether each output should be shown in the script window.
The "Visible" column is only used to define the visibility of the links in the script window. This setting helps to maintain the clarity of the script. You cannot remove outputs, i.e. the connections must be kept, otherwise an error will occur in the script.
The second column "Default" contains the default name of the output. This provides information about events during the execution of a block so that additional appropriate connections can be created. This fixed name cannot be changed. You can assign your own identifying names to the various contact surfaces in the column "Link name". This name will later appear in the block in the grid interface.
In the last column "Linked to" you see which block input this output is connected to. Here you have the option of selecting a link from a select list, which contains all available blocks.