18.2.24 Editing information areas (display elements)
Display elements are used to display various information, such as e. g. Date, time, charges, caller’s name and telephone number, name and telephone number of the person being called, etc.
You can arrange the display elements as you wish on suitable areas of the skin. On the standard Skin, some of the display elements are e.g. located on the line buttons. On older Skins, the display elements are arranged on a telephone display. The following describes how you can change, add, or delete existing display elements.
Search function
The display element with the information type "Number Dialed" is a special feature. This serves not only for display, but also for entering a number or name, and it also includes the search function.
Configure display element
With SwyxIt! Classic you can change the appearance of and the information to be presented in the individual display elements. A display element is composed of the following components:
You can also specify whether the element should always be displayed, or only on a particular tab.
To change the appearance of a display element
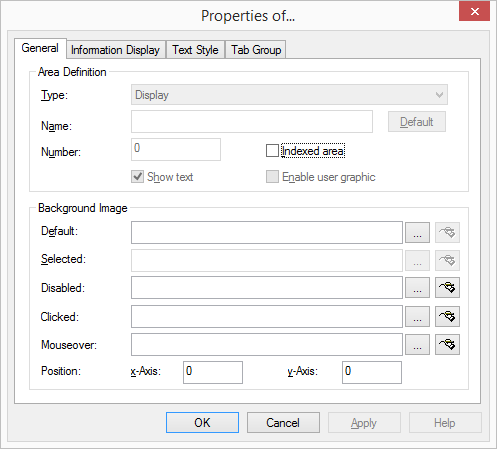
The “General” Tab
On this tab, you define the general settings for the display element.
To define the general settings for the display element
 to edit the selected graphic using the linked graphic application.
Please make certain that the background for a display, in which you would like to display a call history, has a sufficient height (approx. 6-8 lines).
The “Information Display” Tab
On this tab, you indicate the information to be shown on a display element. The following information is provided for display.
Available Information | Explanation |
|---|---|
Active Call Forwarding | Display of Call Forwarding Unconditional (Call Forwarding: <destination>) |
Active Server | Display of the server to which SwyxIt! Classic is currently logged on. |
Called Extension (incoming) | Display of the extension dialed by the caller |
Called Name (incoming) | Display of the subscriber name dialed by the caller |
Date | Current Date (dd.mm.yyyy) |
Own name | User name, with which SwyxIt! Classic is logged on to SwyxServer. |
Charges | Charges incurred for the active connection |
Number Dialed | Display of an entered number or search function. |
Messages | Information from SwyxIt! Classic These are status messages, which SwyxIt! Classic outputs for an action, e.g. during log-on to SwyxServer, or in case of a change into the CTI mode. |
Name | Name of the caller (if available) XXX stands for an unknown caller |
Name / Number | Name and number of the caller (if available) XXX stands for an unknown caller |
Number | Number of the caller (if available) XXX stands for an unknown number |
Call History | Shows all actions that you have executed with this call. |
Call History (brief) | Shows in abbreviated form all actions that you have executed with this call. |
Time | Current Time (hh:mm:ss) |
Forwarded from name | Name of the subscriber who forwarded this call. |
Forwarded from number | Number of the subscriber who forwarded this call. |
Duration of connection | Duration of the active connection (hh:mm:ss) |
Connection state | State of the active line. |
If a display element should show more than one piece of information, you can indicate the priority of each piece of information. For example, if one and the same display element should show the current time and a caller’s number/name, it makes sense to assign a higher priority to the number/name information than to the time information. As soon as a call is received, the time information is hidden and the number/name information is shown.
The fields “Minimum display time” and “Maximum display time” are used to indicate how long new information should be shown in the display.
Example:
If you enter 5 seconds in the “Minimum display time” field and 10seconds in the “Maximum display time” field for the number/name information, this information will be shown for at least 5 seconds (even if information with higher priority should be available in the meantime) and for a maximum of 10 seconds. After this time has expired, the information element with the lower priority, in this case, the time, will once again be shown.
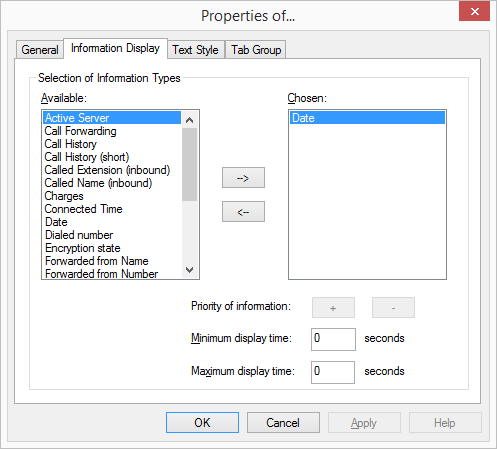
All types of information which can be shown on a display element are listed in the “Available” list box.
The list box “Chosen” contains a list of the information which actually will be shown on the selected display element.
To add information to a display element
2 Click on  .
.
To remove information from a display element
2 Click on  .
.
To change the priority of information in the display element
 , to increase the priority
 , to decrease the priority
To define how long information should be displayed
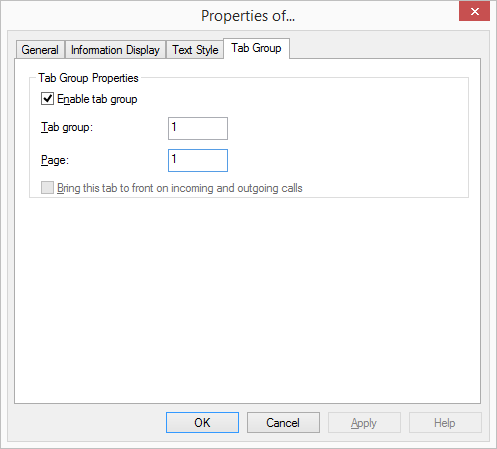
The “Tabs” tab
You can group display elements on tabs. You must give the information on the group and page for each element that is to be positioned on a tab.
Before you assign the group and page information for the tab for individual skin elements, you should first create the tab elements with the group and page information.
Note the information on creating tabs under 18.2.26 Tabs (page elements).
To assign a skin element to a tab
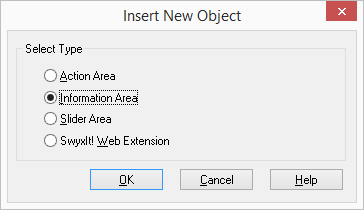
Add Display Element
The following describes how to add a display element.
To add a new display element
Removing a Display Element
The following describes how to remove a display element.
To delete a display element