1.6.3.1 User
Under the menu item Extensions, you can make the following settings:
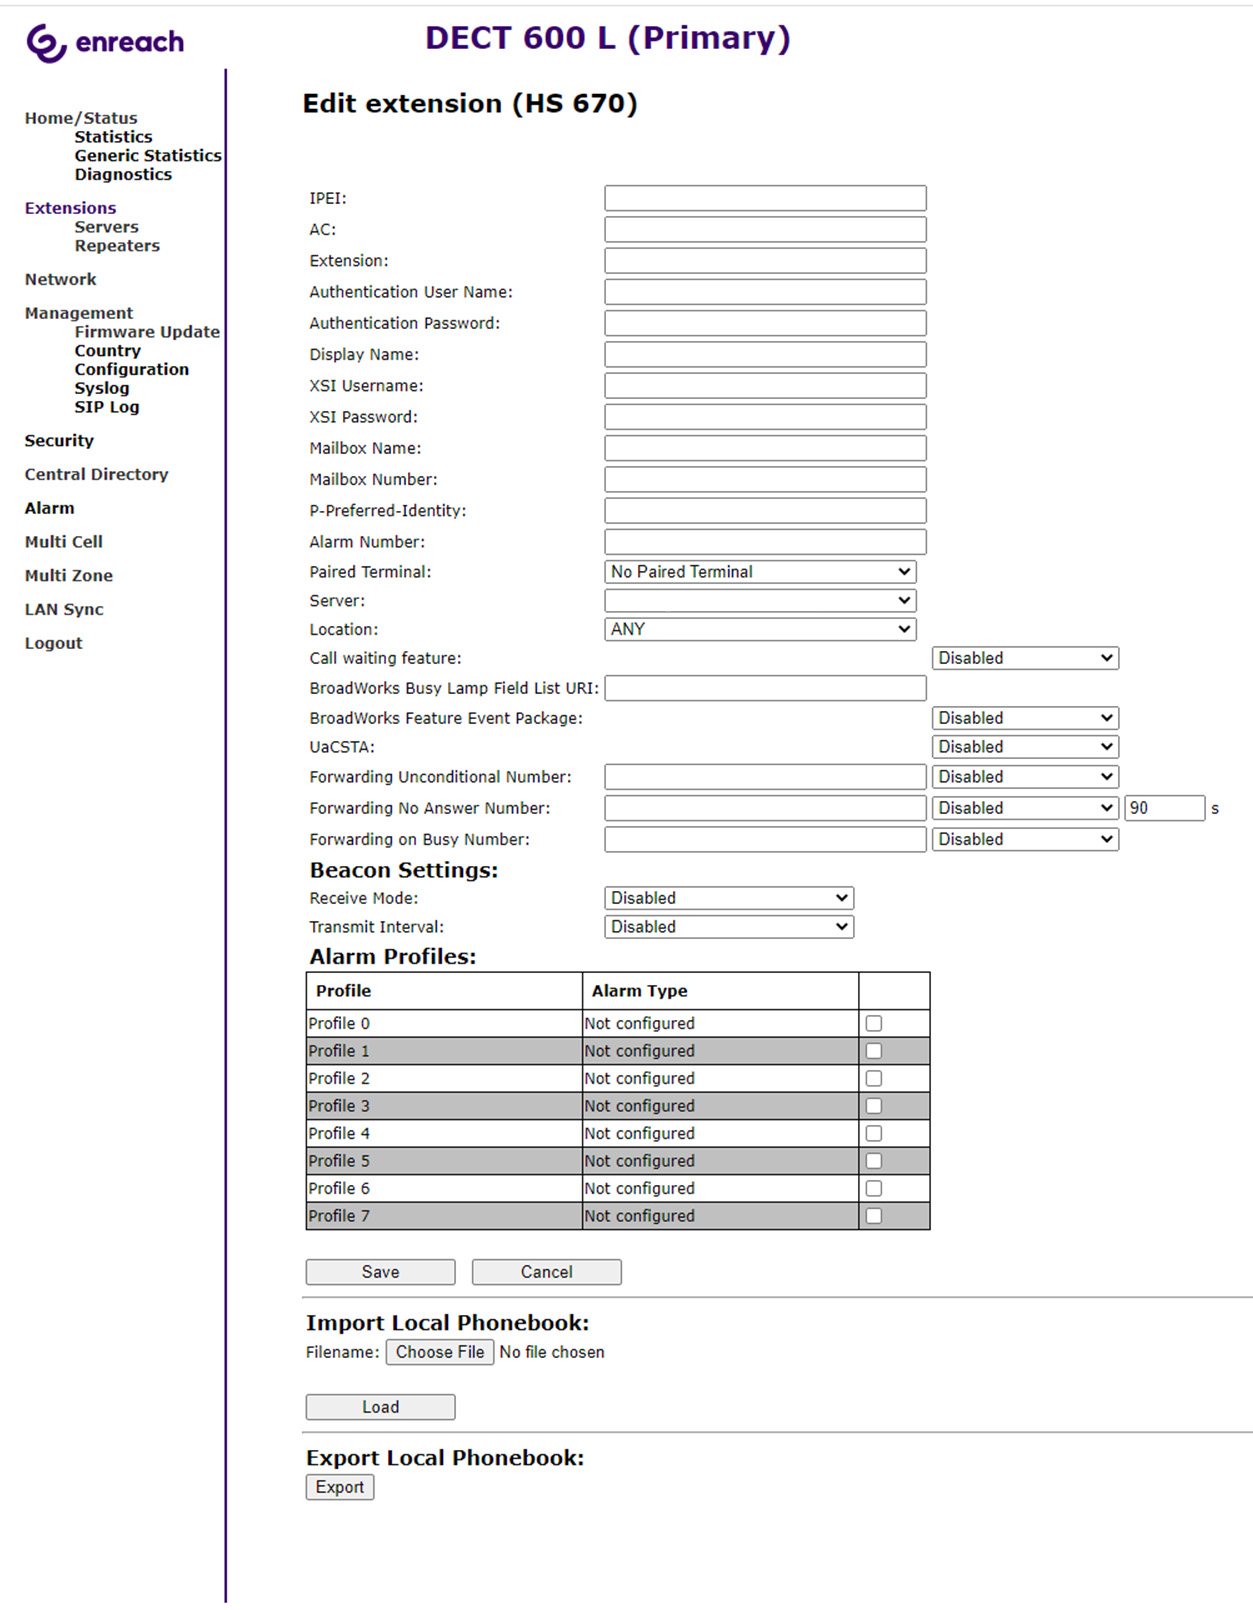
Web interface extension DECT 600 L
IPEI | (International Portable Equipment Identifier) Serial number of the DECT handset. The IPEI number is assigned to each handset by the manufacturer and can be viewed in the menu under Settings | Statusmenu. |
AC (Access Code) | a number with 4 digits, which you assign to the user´s handset for the registration at a base station. |
Extension | SIP user ID you entered into the user's properties on the SwyxWare Administration. |
Authentication User Name | SIP user name you entered in the user's properties on the SwyxWare Administration. |
Authentication Password | The password you entered in the extensions properties in the SwyxWare Administration. |
Display Name | Additional designation appearing on the handset's display. |
Mailbox Name | The user’s phone number |
Mailbox Number | Here you can e.g. enter the function code for remote query (##10). |
P-Preferred-Identity (sender call number): | Here you can enter further numbers additionally to the own number of the user (e.g. "234;220;478" for an internal number, a group number and an alternative number). Subsequently the user can decide for every external call with the selection of the desired line, which number he wants to signal. |
Alarm Number | Enter a number of the person to whom the alarm of this user should be delivered. Then select the desired profile for the user at the bottom of Alarm profiles. See Alarm. |
Server | SwyxServer IP address; several SwyxServer can be selected. |
Location | Select via which base the user should communicate with SwyxWare. To avoid problems with IP roaming, you should select a base station and not ANY. |
Call waiting feature | If you activate the Call Waiting function, a call is made to the subscriber when the line is busy. Deactivate the call waiting feature to indicate only busy to the caller. |
BroadWorks Feature Event Package | If activated (recommended), call forwarding is performed via the telephone system. Calls can then be handled by SwyxWare and, for example, correctly rejected as "busy" with DND (do not disturb). Default setting: Disabled. |
Forwarding Unconditional Number | If you enable Unconditional Forwarding for the user, enter a number in the input field to which a call should be forwarded immediately. It is recommended to disable this option. The user can set this himself on his handset if required. |
Forwarding No Answer Number | If you activate the delayed call forwarding for the user, enter in the input field a number to which a call should be forwarded and the time in seconds from which the call forwarding will be activated. It is recommended to disable this option. The user can set this himself on his handset if required. |
Forwarding on Busy Number | If you activate call forwarding on busy for the user, enter a number in the input field to which a call should be forwarded immediately if the user's line is busy. It is recommended to disable this option. The user can set this himself on his handset if required. |
Add user
Before you can add extensions, you must first create a server, see Server.
Before registration of the new user please keep at hand the serial number (IPEI) of the concerning handset ready. The serial number can be found in the handset menu under Settings | Status.
To add a new user
First make sure that the user has already been set up in SwyxWare. See the documentation for SwyxON or Swyx Control Center.
Server
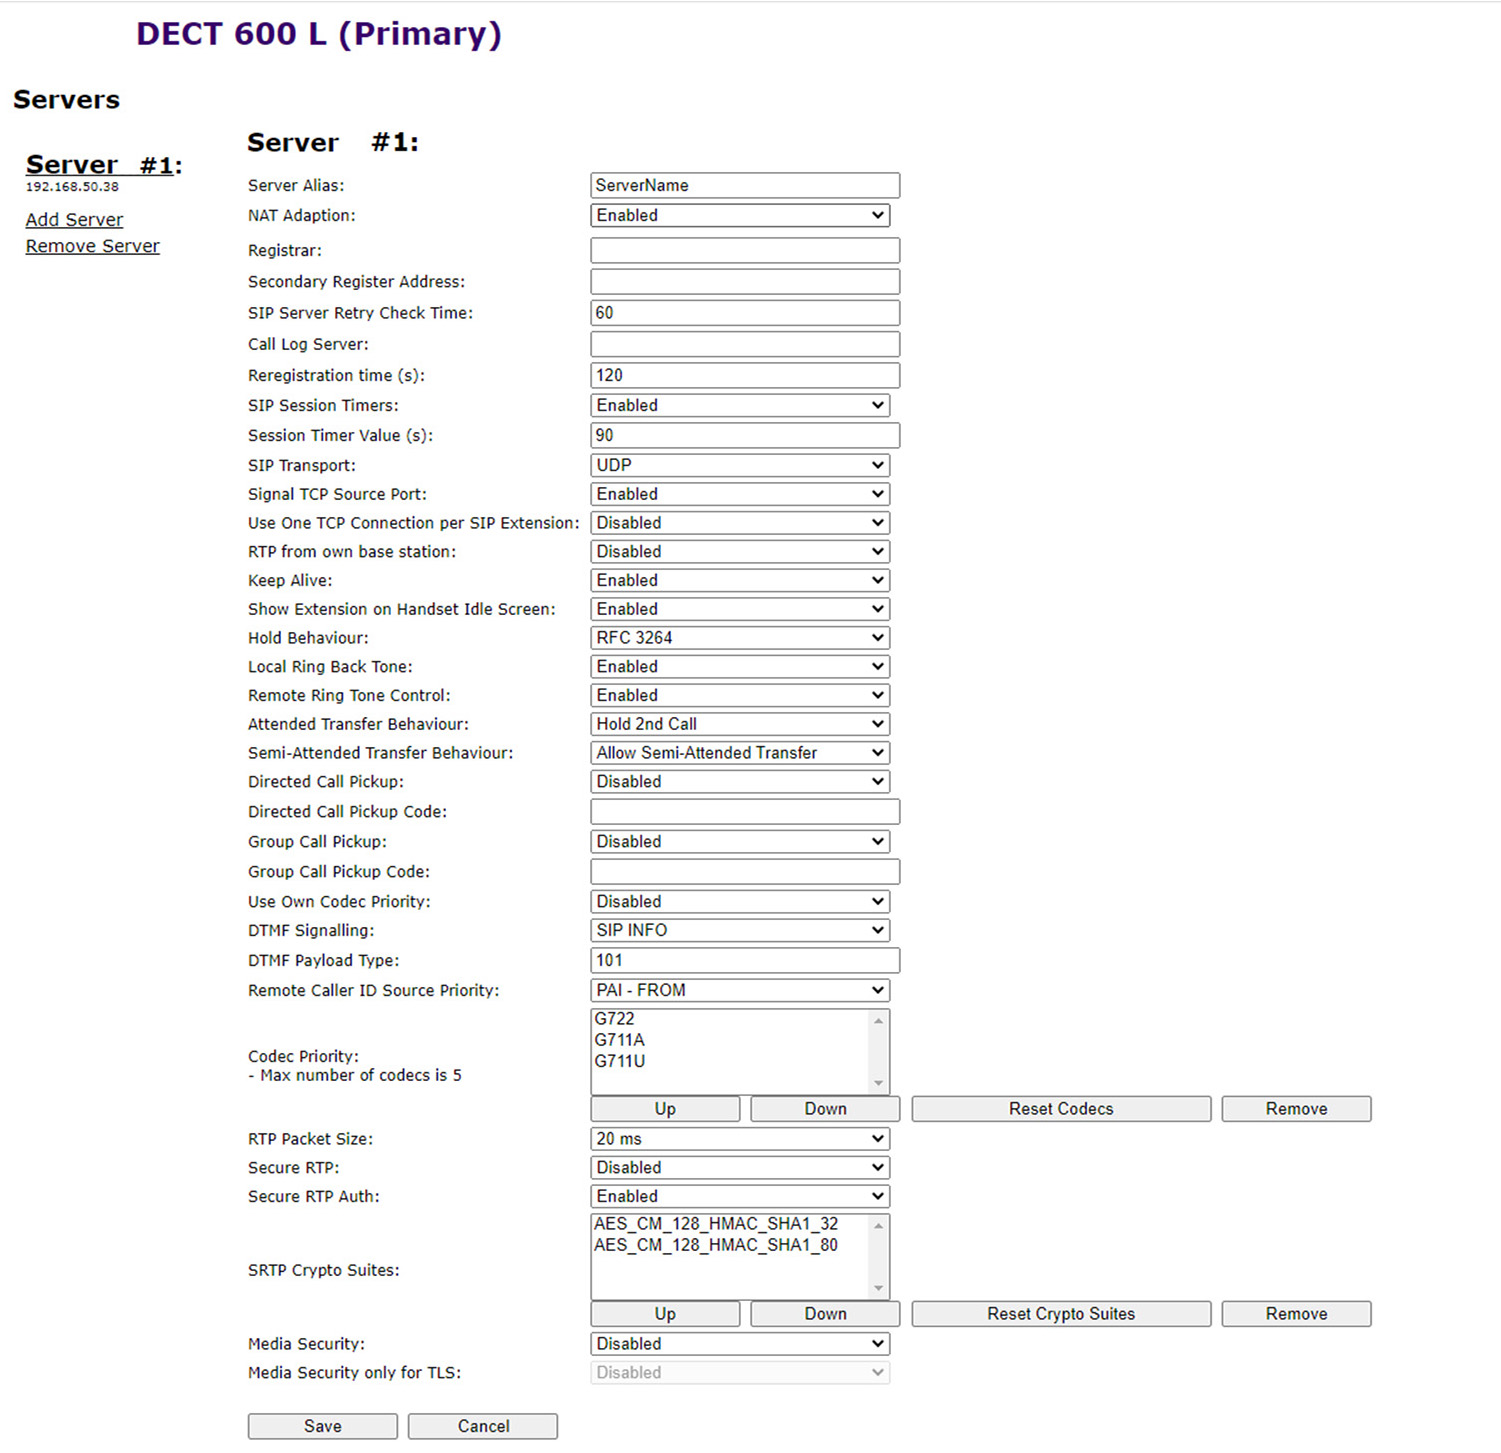
Server Alias | Here you can name the server. Maximum 10 characters. |
NAT Adaption | If this option is enabled, all SIP messages are routed directly to the NAT gateway in the SIP-Aware router. By default, this option is enabled. |
Registrar | SwyxServer IP address |
Secondary Registetr Address | IP address of the standby server |
SIP Server Retry Check Time | The interval (in seconds) to identify the active server in a standby system. |
Reregistration time (s) | The time period (in seconds) for re-registering the base station SIP to SwyxServer. |
RTP from own base station | If enabled, only the base station to which the user is logged in is used for data transmission to the outside (this option is only useful if the network load is not optimal). |
Keep Alive | This option defines the time period for opening the ports of relevant NAT-Aware routers. |
Show Extension on Handset Idle Screen | Display of own extension number on the handset. |
Use Own Codec Priority | If enabled, the codec priority of the base station is preferred over the codec priority of the server. |
DTMF Signalling | Method of signaling key presses during a call. |
Codec Priority | Selection of the codec priority that the Base Station should use for audio compression and transmission. Via the buttons Up and Down you select an order. Note that the codec affects the number of simultaneous calls per cell. |
RTP Packet Size | This setting should be changed only after consulting the support. |
To add a new server
Repeater
Via Repeater you can extend the range of your base stations by installing additional repeaters. Up to 6 DECT R 600 repeaters can be connected to one DECT 600 L base station. Up to five (for G.711 five, for G.729 five, for G.722 two) simultaneous calls per repeater are possible.
Due to the connection type (DECT), the capacity of possible calls in a repeater cell is halved. When the call capacity of a repeater cell is reached, triggered for example by a cell change (roaming), this can lead to dropped calls.
To add a repeater
Avoid registering repeaters and handsets at the same time, as this may result in undesired cross effects.
Last modified date: 09.08.2023